
How to set up a seating plan for your ticketing in 7 steps
From your venue’s existing plan to the day sales open: the seven steps to set up a seating plan in your ticketing, and the mistakes to avoid.
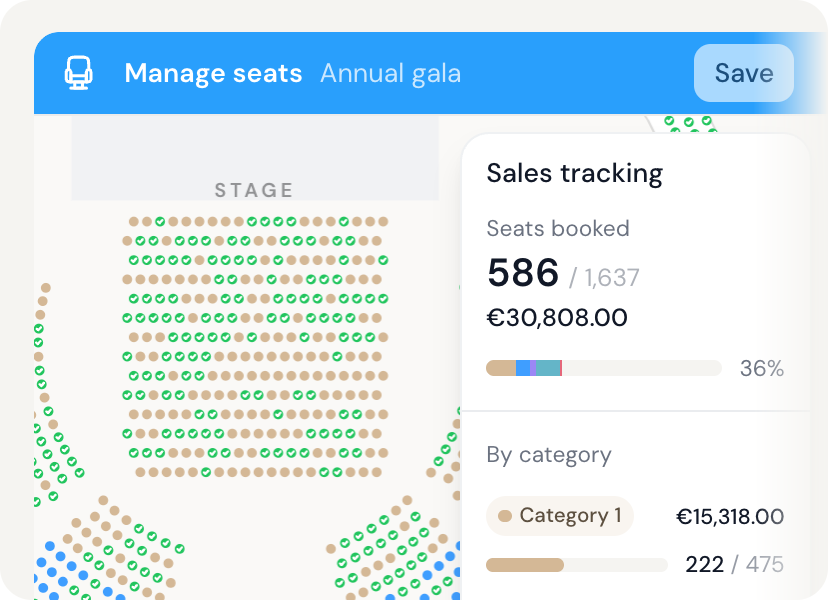
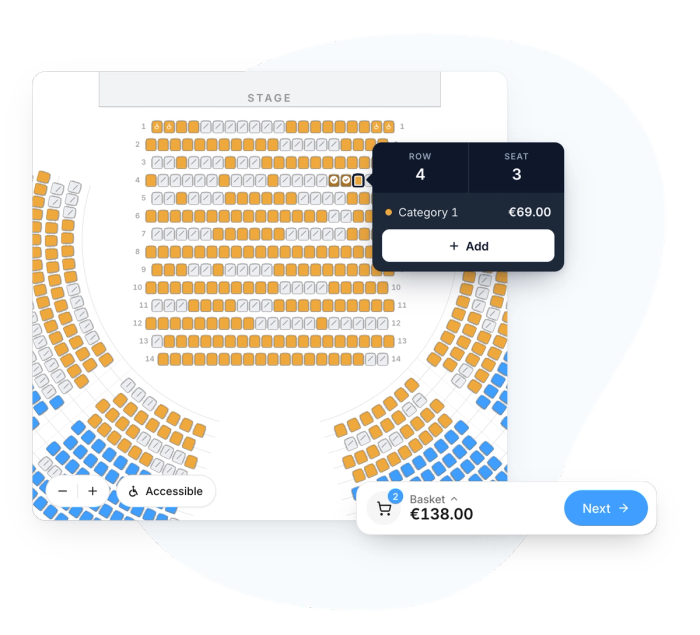
To set up a seating plan for your ticketing, start from the venue’s existing plan, divide it into sections, set a price for each section, mark special seats (wheelchair spaces, restricted view), hold the seats you need, then check the plan on desktop and mobile before opening sales. With PassPass, our team recreates the venue from your plan, and you review it before sales open.
Here is each step in detail, whether you are preparing a single show, a cultural season or a gala.
1. Gather information about your venue
Everything starts with the existing plan: the one supplied by the venue, an architect’s drawing, an old printed version or even an annotated photo. It should tell you:
- the number of rows and seats per row, level by level (stalls, circle, boxes);
- the actual seat numbering, as shown on the seats;
- where the stage, aisles and entrances are;
- the venue’s permitted capacity in the planned layout.
2. Choose the layout
The same venue can host several layouts: fully seated, a standing pit with tiers, tables for a gala. Decide for each area whether it will be reserved seating or general admission. If you are unsure, our article on reserved seating vs general admission will help you decide.
If the venue changes layout during the year, plan one seating plan per layout rather than editing the same plan for every event.
3. Divide the venue into sections
A section groups seats sold at the same price. It is usually based on the quality of the view and the distance from the stage: front stalls, rear stalls, circle, side seats. A few pointers:
- two to four sections are enough for most venues; beyond that, the offer becomes hard to read;
- each section gets its own colour, so buyers can spot prices at a glance;
- a section does not have to be in one block: the best seats in the stalls and the circle can share the same category.
4. Set your prices by section
For each section, define the prices on offer: full price, concession, child. With the right tool, the same seat can be sold at several prices: the attendee picks theirs in the basket, and you do not have to duplicate the section.
Think about the timeline of your sales too: an early bird price followed by a standard price, promo codes for partners and subscribers. State the conditions for each concession (age, proof required) clearly on the event page.
Preparing a show or a season?
Our team recreates your venue from your existing plan. You review it, set your prices and start selling.
Explore the seating plan5. Mark special seats
Some seats need to be flagged on the plan so buyers know what to expect:
- wheelchair spaces and the companion seats right next to them;
- restricted-view seats, behind a pillar or at a sharp angle, to be flagged and often offered at a lower price;
- technical positions: sound and lighting desk, cameras, follow spots, which will not be sold.
For wheelchair spaces, location matters as much as marking: step-free access, proximity to an exit, a clear view. We cover these points in our article on wheelchair-accessible seating.
6. Plan which seats to hold
Before sales open, take the seats you will need off sale: guests, press, partners, performers, staff. Keep a sensible margin: held seats that nobody uses are unsold seats. Ideally, you should be able to release them at any time, as soon as you know they will not be needed.
7. Check the plan, then open sales
Before opening sales, go through the plan as an attendee would:
- compare the numbering on screen with the numbering on the seats, row by row;
- select seats on desktop and then on mobile, up to the payment step;
- check the prices in each section and the price types on offer;
- check the wheelchair spaces, companion seats and held seats.
Once sales are open, track how each section is filling. If one section is selling more slowly than expected, you can adjust your marketing or your prices. On the day, tickets are scanned at the door from a smartphone, using their QR code.
Common mistakes
- Numbering that does not match the venue. It causes confusion on the night. Check the direction of the numbering (odd and even on either side, or continuous).
- Too many sections. With more than four or five different prices, buyers get lost.
- Forgotten technical positions. A sound desk set up on seats that have already been sold means reseating people.
- Restricted-view seats that are not flagged. They can lead to complaints and refund requests.
- A plan never tested on a phone. More than 60% of web traffic now comes from phones.
How PassPass supports you
With PassPass, you do not draw your venue on your own. Set-up follows four steps:
- An initial conversation about your venue, sections, prices and schedule.
- Building your plan: our team recreates the venue from your existing plan or your instructions.
- Review and settings: you check the plan and set your prices by section, on your own or with us.
- Opening sales: our team remains available throughout your sales.
The plan then runs inside your regular PassPass ticketing, with sales tracked seat by seat and by category. It comes in five styles, from minimal to light 3D, which you can switch at any time. Find out more on our seating plan ticketing page and in our guide to selling reserved seats online. Running a cultural venue? See also our page on cultural venue ticketing.
Frequently asked questions about setting up a seating plan
No. An existing plan, even a simple one, or your instructions (rows, seats per row, numbering) are enough to get started. At PassPass, our team recreates the venue from this information, then you review it.
Two to four sections suit most venues. What matters is that each section reflects a difference in view or comfort that attendees can understand.
Theatres with balconies, multi-purpose halls, big tops, galas with tables, concerts with a standing pit and tiered seating. A single plan can combine numbered seats and general admission.
With PassPass, yes: the plan comes in five styles (classic, advanced, illustrated, detailed, light 3D), which can be switched at any time without affecting seats or sales.
From your event’s seating plan, you can see the seats booked, the revenue and how each category is filling. You can also hold seats and release them for sale from there.
Let’s set up your seating plan
Tell us about your venue, your sections and your prices in a first conversation.
Talk to our team